

Painters use the words primer, undercoat and sealer as if they are interchangeable. They are not. Each one solves a different problem, and using the wrong one — or skipping it — is behind most of the paint failures we get called out to look at.
Here is what primer, undercoat and sealer each do, and what belongs on which surface.
Sealer: stops the surface drinking your paint
A sealer’s job is to close down a porous surface so the finish coats sit on top instead of soaking in.
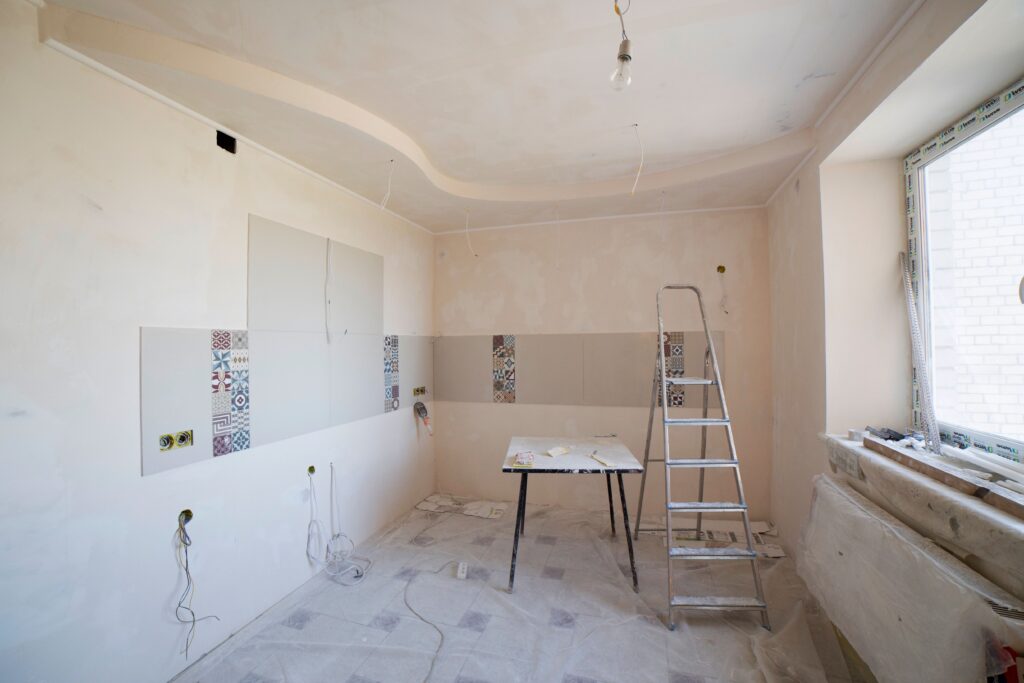
New plasterboard is the classic case. Bare board and the joint compound over the screws and seams absorb at completely different rates. Paint straight onto it and the joints and patches dry duller than the rest of the wall — flashing. No number of finish coats fixes it, because the absorption difference is still there underneath.
The same applies to fresh render, bare masonry, new cement sheet and skim-coated walls. All of them need sealing before colour goes anywhere near them.
Primer: makes paint stick to something difficult
A primer is about adhesion. It is what you use when the surface itself is the problem rather than its porosity.
Bare metal, galvanised steel, powder-coated surfaces, melamine, laminate, tile and glossy old enamel all share the same issue: there is nothing for a water-based topcoat to grip. An adhesion primer gives it a mechanical and chemical key. Metal primers usually include a rust inhibitor as well, which is why you cannot substitute a wall sealer on a steel window frame.
Bare timber needs a primer too, but for a different reason — it has to lock down the surface fibres and resins before anything else happens.
Undercoat: builds a flat, uniform base
An undercoat is a build coat. It is formulated to be applied, sanded back flat, and leave an opaque even-coloured base for the finish.
This matters most on trim — doors, skirtings, architraves, window frames. Enamel finishes are unforgiving: every ridge, brush mark and filled nail hole shows through gloss. The undercoat is where you get the surface flat, not the topcoat.
Undercoat also does colour work. Going from a dark wall to a light one, a white undercoat is how you kill the old colour so your two finish coats are doing nothing but finishing.
Stain blockers: the fourth category nobody mentions
There is a fourth product that is neither of the above, and it is the one most often missing from a quote.
Water stains on a ceiling, tannin from hardwood, nicotine in an old rental, permanent marker on a kid’s bedroom wall — all of these migrate. They are soluble in the water in your paint, so each coat you apply draws them up again. Within weeks the stain is back, usually looking worse for being slightly diffused.
The fix is a solvent-based or shellac-based stain blocker, which the stain cannot dissolve into. One coat of the right blocker ends the problem permanently. Three coats of good acrylic will not.
Primer, undercoat and sealer: what goes on what
- New plasterboard, skim coat, fresh render, bare cement sheet: sealer.
- Patched or repaired walls: sealer over the patches at minimum, ideally the whole wall.
- Bare softwood and pine: timber primer, then undercoat on trim.
- Hardwood, cedar, merbau and other tannin-rich timbers: oil or shellac-based primer, not water-based.
- Galvanised steel, aluminium, powder coat: etch or adhesion primer with rust inhibition.
- Melamine, laminate, tile, glossy enamel: adhesion primer after degreasing and sanding.
- Water-stained or smoke-affected ceilings: stain blocker first, then sealer or finish.
- Sound previously painted walls in good condition: usually nothing. Two finish coats is correct.
That last line is worth saying plainly. A good repaint over sound existing paint does not need a primer, and a painter adding one to every surface regardless is padding the job.
Does “paint and primer in one” work?
Sometimes, within limits. Self-priming paints are genuinely thicker and hide better than standard paint, and on a sound previously-painted wall in a similar colour they are fine.
What they do not do is replace a real primer on a difficult substrate. They will not stop tannin bleed, they will not grip melamine, they will not inhibit rust and they will not reliably seal bare plasterboard. If a quote relies on a self-priming product to handle bare or glossy surfaces, that is a shortcut and it will show.
A few Melbourne-specific notes
Older inner-suburb homes in Richmond, Fitzroy and Carlton often have decades of oil-based enamel on the trim. Water-based paint will not bond to cured enamel without an adhesion primer, no matter how well it is sanded. This is the single most common cause of trim paint peeling off in sheets a year later.
Solid plaster in period homes behaves differently from plasterboard — it is denser, often repaired with mismatched materials, and frequently needs sealing in patches rather than uniformly.
Coastal properties through the bayside suburbs and down the Peninsula carry salt on exterior surfaces. Salt has to be washed off before priming, because a primer applied over salt deposits is bonded to the salt rather than the substrate.
If you have had paint bubble, peel or flake, the cause is almost always at this layer rather than in the topcoat.
What to ask your painter
- Which surfaces are getting a sealer, a primer or an undercoat, and which are getting none?
- What product specifically, and is it water-based or solvent-based?
- How are you handling the existing enamel on the trim?
- If there are stains, what is blocking them?
The answers on primer, undercoat and sealer tell you whether someone has looked at your surfaces or is quoting a generic job.
Get it specified properly
We work out the primer and sealer schedule on site, surface by surface, and it goes on the quote in writing. If you want an assessment of what your place actually needs under the paint, call 0404 330 332.
📍 Our Service Areas Across Melbourne, the Mornington Peninsula, Surf Coast & Phillip Island
Melbourne & Bayside
- Expert Painting and Renovation in Richmond
- Expert Painting and Renovation in St Kilda
- Expert Painting and Renovation in South Yarra
- Expert Painting and Renovation in Malvern
- Expert Painting and Renovation in Hawthorn
- Expert Painting and Renovation in Kew
- Expert Painting and Renovation in Balwyn
- Expert Painting and Renovation in Mount Waverley
- Expert Painting and Renovation in Ringwood
- Expert Painting and Renovation in Doncaster
- Expert Painting and Renovation in Hampton
- Expert Painting and Renovation in Frankston
- Expert Painting and Renovation in Mount Eliza
- Expert Painting and Renovation in Mornington
- Expert Painting and Renovation in Mount Martha
- Expert Painting and Renovation in Rosebud
- Expert Painting and Renovation in Sorrento
Phillip Island & Bass Coast
- Expert Painting and Renovation in Flinders
- Expert Painting and Renovation in Somers
- Expert Painting and Renovation in San Remo
- Expert Painting and Renovation in Cape Woolamai
- Expert Painting and Renovation in Cowes
- Expert Painting and Renovation in Coronet Bay
- Expert Painting and Renovation in Tootgarook
- Expert Painting and Renovation in Rye
- Expert Painting and Renovation in Blairgowrie
- Expert Painting and Renovation in Portsea
- Expert Painting and Renovation in Inverloch
- Expert Painting and Renovation in Kilcunda
- Expert Painting and Renovation in Ventnor
- Expert Painting and Renovation in Newhaven
Surf Coast & Bellarine Peninsula
- Expert Painting and Renovation in Geelong
- Expert Painting and Renovation in Torquay
- Expert Painting and Renovation in Ocean Grove
- Expert Painting and Renovation in Barwon Heads
- Expert Painting and Renovation in Anglesea
- Expert Painting and Renovation in Lorne
- Expert Painting and Renovation in Apollo Bay